Analysts typically use Jira to kick off Product engagement. Here is a high-level description of the process in Jira:
- Product items ready for analysts to review will show in this Jira filter.
- The Analyst management team will review and assign available Product items.
- Each Analyst will then need to create an epic from the Dynamite project in Jira for each item they will be working on and assign the Epic to themselves.
Creating epics and connecting parent initiatives
Here are detailed instructions our analysts can use when creating epics and parent initiatives:
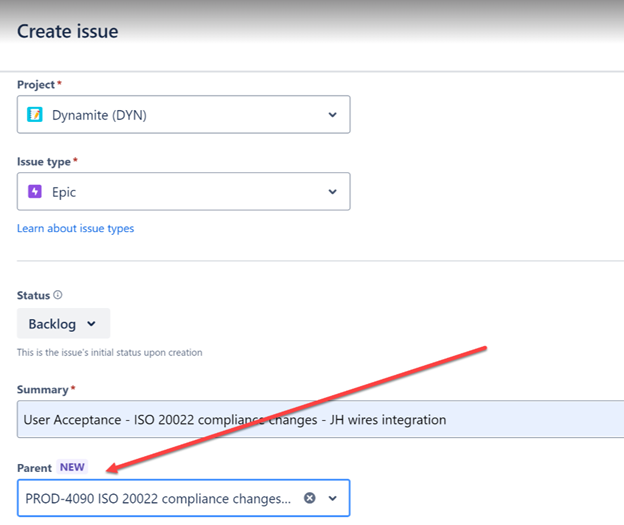
- When creating an epic, prepend the title with "User Acceptance" followed by a dash and the specific project name. Here's a text-based example, followed by a screenshot of numerous examples of properly titled epics in Jira:
User Acceptance – Expand Payee Name to 80 Characters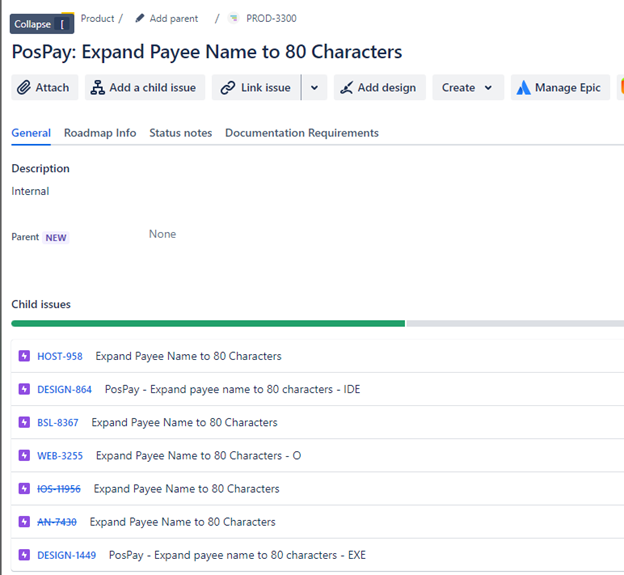
- Be sure to link the parent initiative in the Parent field, which is seen in this screenshot:
Tip: If you don’t update the Parent field when you initially create your epic, you can then open the epic and add the parent initiative, as seen here: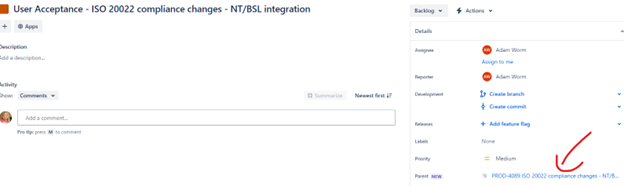
- When a user creates an Epic – 4 subtasks will be created, and the parent field will be updated with the Epic.
- Analysts will need to update the Assignee field to themselves, on the Epic and each of the subtasks.
- When a user changes the Epic or subtasks to in progress the start date will be updated with the current date.
- Analysts will need to update the original estimate on the subtasks.
- Analysts will need to update the end date on the Epic once they have enough information to know this.
- When the status of the product epic is in Backlog, the linked epic and tasks on the Dynamite board should be set to Backlog.
- When the status of the product epic moves out of the Backlog status, the linked epic and tasks on the Dynamite board should be set to ‘To Do’.
- When you start work on your items, the epic assigned to you should move to ‘In Progress’ as well as the task you are actively working on.
Link Epic to Work Items
For each Epic created, the Analyst will need to Link to specific work items, as 'depends on'. This allows the project team to see what needs to be done before UAT can be completed.
- Once the Epic is created, go to the linked Initiative. Make note of the work items that start with WEB, ENT, IOS and AN.
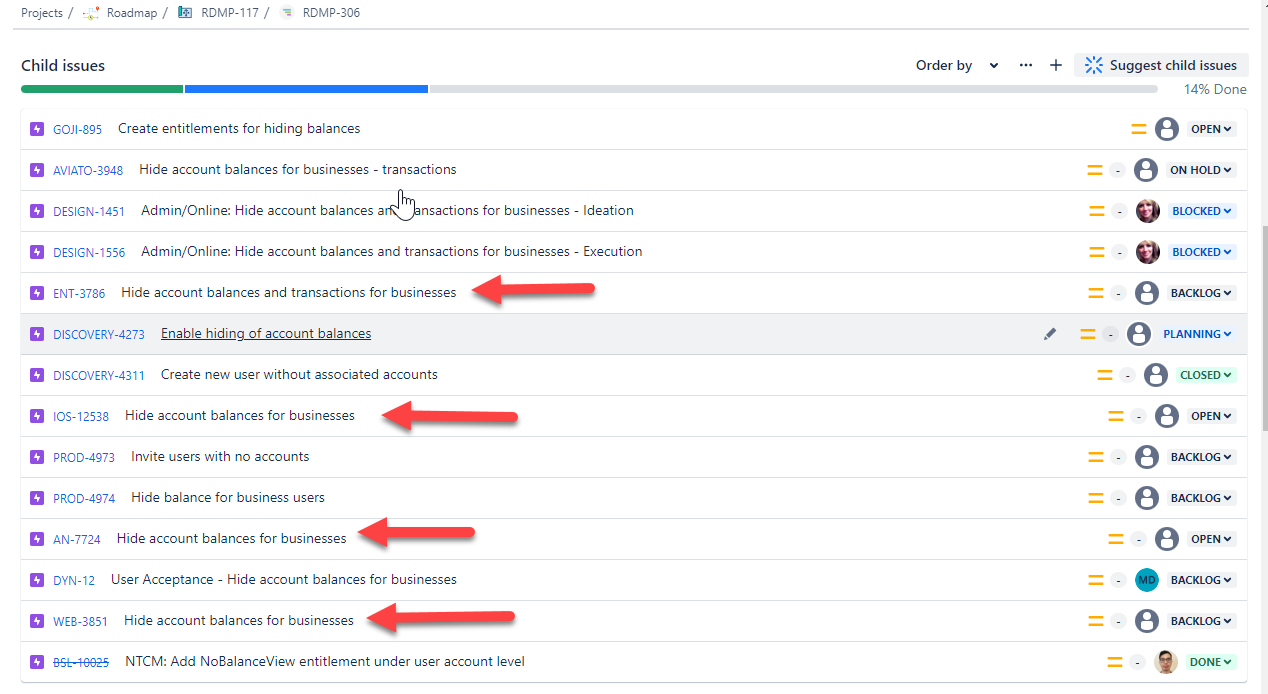
- Go back to the DYN epic. Select the + in the far left of the epic, and select Link Issue.
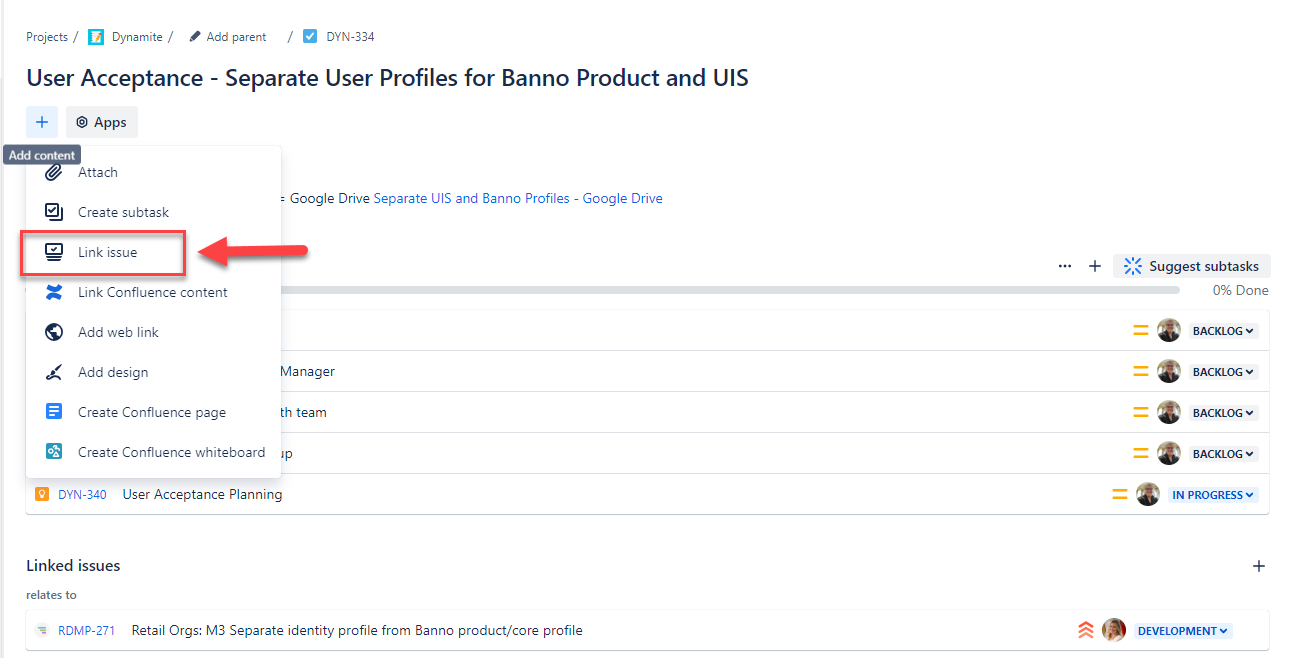
- Under the linked issues select 'depends on' and then enter the work item number. Then select the Link button.
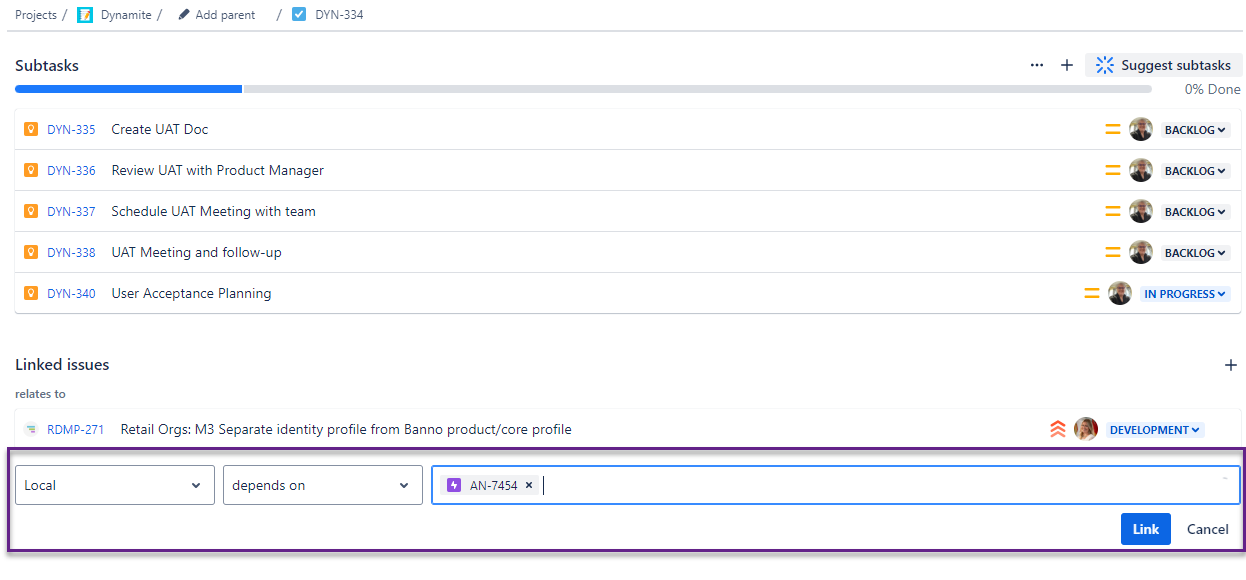
- When everything is linked it will look like this:

Timeframe Guidelines
Analysts need to update dates, PI and PI Target on a regular basis to keep the jira items current.
- Start date
- Updated with the current date at the time the Epic or subtask is moved to in progress.
- End Date
- End date should not be in the past
- End date should not be further out than the ending of the PI target end date
- PI
- List the PI that work is being done in.
- This field can have multipel values. If a PI starts in one but finishes in the next, both PIs should be listed.
- PI Target
- List the PI that the work is targeted to be completed in.
- This field will only have one value.
- List of dates for each PI Calendar
UAT Doc Creation and Testing Coordination
The analyst will create Acceptance Test docs from Google Drive project folders:- If the product manager has not provided a direct link in the project initiative, analysts can search the Google Docs - Project List by using the Search in drive field at the top of the page.
- The project folder should be linked in each project channel, and that folder should include the project brief.
- Creating UAT doc from a template:
- Click 'new' from a project folder view.
- Hover over the arrow next to Google Sheet, click From a template.
- Select the acceptance testing template doc.
- Edit away! This doc also has a tab for test users, additional tabs can be created for multi-core support.
- Send completed UAT doc to the product manager for review, and then send it to the project team when ready.
- Put a link to your completed UAT doc in the Create UAT Doc task.
- Set up notifications on the UAT document.
- Open the UAT document. Go to Tools > Notification Settings > Edit Notifications
- Notification rules will display. Select which one you want to set up. It can be Any changes, or when a user submits the form.
- Then select how you want to be notified. A daily digest emailed or getting an email after each change, right away.
- Select Save
- Work with the project team to schedule the acceptance testing meeting when engineering teams are ready.
- As development nears completion, ask in meetings, or in the project Slack channel, when everyone would like to schedule the UAT meeting.
- During acceptance testing, mark failing items accordingly with needed notes, and work closely with engineers to ensure fixes to failing tests are captured appropriately.
- Follow up with engineers to ensure all failing items are fixed, this can either be done with additional meetings or asynchronously in Slack.
- Inform product manager when acceptance testing is complete.
Additional tasks and expectations
Here's additional information our analysts can expect:
- Once an individual analyst is assigned, reach out to the Product Manager, via Slack. Introduce yourself, ask to be invited to project meetings and project Slack channels.
- Create credentials and data as needed for the project team.
- In the earlier meetings, ask the project team what types of test users they will need.
- Create the test users and data as quickly as possible to facilitate development and early testing.
- Test users can be added to the appropriate tab of the UAT document.
- Ensure you are attending the project meetings.
- Make sure that you are keeping current with items in the project Slack Channel.
- Respond to all requests for status updates. Type out a response, do not just give an update using an emoji.
- Work with the project team to schedule the acceptance testing meeting when engineering teams are ready.
- As development nears completion, ask in meetings, or in the project Slack channel, when everyone would like to schedule the UAT meeting.
- During acceptance testing, mark failing items accordingly with needed notes, and work closely with engineers to ensure fixes to failing tests are captured appropriately.
- Follow up with engineers to ensure all failing items are fixed, this can either be done with additional meetings or asynchronously in Slack.
- Inform product manager when acceptance testing is complete.